
Setup Android for Eclipse IDE
In this tutorial, you will learn which software is required to run an Android application on the Eclipse IDE. Here, you will be able to know how to install Android SDK and ADT plugin for the Eclipse IDE. Let's install the software list manually for the Eclipse IDE.
- Install the JDK
- Download and install the Eclipse for developing android application
- Download and Install the android SDK
- Intall the ADT plugin for eclipse
- Configure the ADT plugin
- Create the AVD
- Create the hello android application
1) Install the Java Development Kit (JDK)
For creating android application, JDK must be installed if you are developing the android application with Java language. download the JDK
2) Download and install the Eclipse IDE
For developing the android application using eclipse IDE, you need to install the Eclipse. you can download it from this location download the Eclipse. Eclipse classic version is recommended but we are using the Eclipse IDE for JavaEE Developers.
3) Download and install the android SDK
First of all, download the android SDK. In this example we have installed the android SDK for windows (.exe version).
Now double click on the exe file, it will be installed. I am using the android 2.2 version here.
4) Download the ADT plugin for eclipse
ADT (Android Development Tools) is required for developing the android application in the eclipse IDE. It is the plugin for Eclipse IDE that is designed to provide the integrated environment.
For downloading the ADT, you need to follow these steps:
1) Start the eclipse IDE, then select Help > Install new software...
2) In the work with combo box, write https://dl-ssl.google.com/android/eclipse/
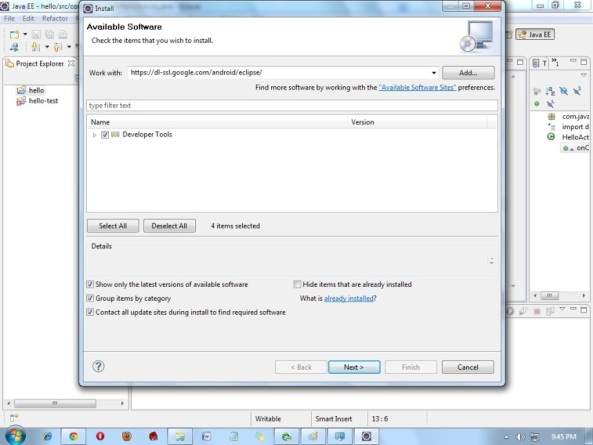
3) select the checkbox next to Developer Tools and click next
4) You will see, a list of tools to be downloaded here, click next
5) click finish
6) After completing the installation, restart the eclipse IDE
5) Configuring the ADT plugin
After the installing ADT plugin, now tell the eclipse IDE for your android SDK location. To do so:
Select the Window menu > preferences
Now select the android from the left panel. Here you may see a dialog box asking if you want to send the statistics to the google. Click proceed.
Click on the browse button and locate your SDK directory e.g. my SDK location is C:\Program Files\Android\android-sdk .
Click the apply button then OK.
6) Create an Android Virtual Device (AVD)
For running the android application in the Android Emulator, you need to create and AVD. For creating the AVD:
Select the Window menu > AVD Manager
Click on the new button, to create the AVD
Now a dialog appears, write the AVD name e.g. myavd. Now choose the target android version e.g. android2.2.
click the create AVD
7) create and run the simple android example
Visit the next page to create first android application.